Cosplay is a word that refers to the practice of people dressing up in costume. In this instance, “cosplayer” is commonly used to refer to a person who dresses up in costume for purposes of cosplay.
Contents
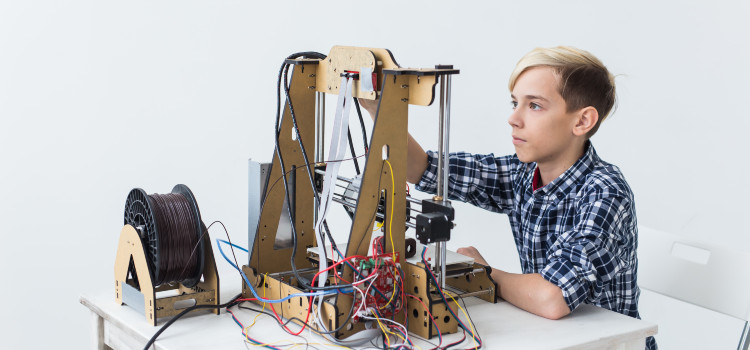
Many cosplayers have started to go the extra mile by using 3D printers to create detailed prop replicas of various costumes. In this article, we will explore a few ways that you can use 3D printers to create your own props for cosplay.
This article will cover how to design your own objects in order to print it on a 3D printer, as well as how you could potentially make money from these ventures. We hope this inspires you and gives you some knowledge on how to do it.
The first question you should ask is:
Should I 3D Print Cosplay?
Another question to consider is whether you are going to 3D print the cosplay you are planning. If the answer is yes, then it is likely that there will be some complications with storage or transportation. Other questions, such as if you should cut out your own costume or purchase it ready-made, depend on how much time and money you have available.
Why 3D Print Your Cosplay?
3D printing has many uses, and one of them is cosplay. 3D printing allows for quick and easy costume creation that’s not limited in terms of resources. This means you can create any type of costume, regardless of how elaborate the design is.
On top of that, the designs that result from 3D printing are totally unique. They are one-of-a-kind, therefore you don’t have to worry about your costume looking similar to other cosplayers wearing the same item.
3D printing also allows for an individualized look as opposed to mass-produced costumes. It’s interesting where attention to detail can be used for your cosplay because it makes it much more personal to you.
3D Printing Makerspaces: What’s a Maker Space?
A Makerspace is a place where people can learn and work on various projects and experiments. By using the various tools and technology available at these spaces, individuals can come together to collaborate, educate, share, create and learn.
Makerspaces give people access to expensive equipment that they may not otherwise have access to. The current maker movement emphasizes do-it-yourself (DIY) as the way to create things in our society. The maker movement is, in part, a growing subculture of hobbyists, entrepreneurs, and professionals participating in the creation of various goods.
Anyone can start their own Makerspace and it becomes more popular as community members begin to learn and teach each other how to use the various tools available through the maker space. In order to create a Makerspace, you will need access to a location with adequate power outlets and ventilation for each tool you plan on acquiring.
Getting Started with 3D Printing For Cosplay
Cosplayers have used 3D printers since they first came on the scene. Cosplayers needed a way to create props for their costumes and these prop makers have been using 3D printers at local Makerspaces in order to do so.
There are a number of popular DIY cosplay projects that help you learn beginner skills in 3D printing, which is why you should start by learning how to 3d print cosplay from small models and miniatures up to big projects like full-size 3d printed cosplay armors.
To create a prop for cosplay, you will need something that you can print; however, there are many things that you should know beforehand.
What Is The Best Material For 3D Printing Cosplay?
PLA and ABS and are good materials for 3D printing cosplay accessories. Polyamide (Nylon) is also an option for cosplay. PLA is a good choice for 3D-printed props, as it’s easy to break off the supports after printing and it has a matte finish that’s less likely to show print lines. ABS can be used for props with finer detail and pieces that need to hold up well against wear and tear, but it requires some more work to remove the supports after printing.
How to Design Your Own Cosplay Props
As you are looking at different cosplay prop ideas, you may find that there are a few things in common with each design. For example, many popular cosplay props use the same design elements to create them.
The most simple designs for cosplay props involve the following:
- Axe or Blade Design
- Handle Design (Axe or Sword)
- Top of Pole Design (Axe or Sword)
These three basic elements can be combined into thousands of different designs and shapes.
You can combine these elements in any way that you want to make a new design using a 3D Printer.
The trick to designing your own prop is to research what other people have done in the past. The Internet is a great place to start your creative process and it will help you find other people who have used the same materials and tools that you have available to you.
Using the Internet, lookup similar designs on Thingiverse or Google 3D Print for cosplay props then print them. You can use the Internet to discover a variety of designs and learn how other people have done similar projects.
Once you have your design, you need to plan out how you are going to build it. Before you start building your prop, take detailed pictures of the designs so that it can be printed as precisely as possible.
Do not take detailed pictures without taking clear pictures of each layer in the design so that it can be easily printed. Make sure that all of your measurements are accurate at this point in time.
As you come up with your different designs, make sure that you are using the latest version of Adobe Illustrator or even 3D Design software. This will really help to make your designs look professional and will result in a large increase in your print quality.
3d Design Software
The software used to create Photoshop files is not always the best choice for designing 3D models. There are many free alternatives to Photoshop online that can simulate the extremely complicated effects that can be achieved with Photoshop.
One of the best software options for those starting out is Tinkercad. No computer skills are needed to achieve professional results, as it is designed to be super easy to use by anyone.
Tinkercad is a free online 3D modeling program that can help you create your own designs for cosplay props before printing them.
In order to get started, all you have to do is go to Tinkercad, then pick a shape and press “Start Designing.” It will then ask for a name, and your new design will start to print.
This is a great online design program that can help you create professional results without having any programming skills. Another fantastic option is Google’s 3D Print for cosplay, which has many different templates and designs available in order to make props easily. Simply right-click on the image you want and select “Save Image” so that you can print it out later on.
How to Add Details to Your Cosplay Props
Add Details To Your Cosplay Prop By Calibrating Your Printer
Now that you have the design of your cosplay prop ready to go, it’s time to start printing it out. The first step in the process is calibrating your printer, which is a great way to ensure that all of your details stay intact, as well as reduce the chances of error when trying to print. Calibrated printers are also less likely to break during printing.
Before you start calibrating your printer, make sure that you have set up a dedicated print area for the design. This will ensure that all of the details and parts are in their proper places. One easy way to do this is to put some masking tape around the area where you intend to print.
It’s important to use specific tape of some sort because if it is not printed on properly, it won’t be strong enough and could go all over your workspace and damage some things in the process.
If you have access to a scale, measure the size of your design and print it out on regular paper. Then tape the printed version to the area where you are going to place your printer, and make sure that there are at least five inches between it and any other objects.
The last thing you need to do is get a good black marker so that you can draw any imperfections or details onto the design.
Selling and Marketing Your Work During the Conventions Season
Once your cosplay prop is printed, the next step in the process will be to sell it. The industry is full of seasoned artists who have been selling their work for years, so there are plenty of people who want to buy it. The best way to make sales is to use your social media contacts and get some positive feedback from those who see the designs you have printed out. This will help you promote your product, but most importantly it will allow you to get new followers and customers willing to buy your work next year.
The sales of your product will determine how much money you earn during the convention season, so it’s very important to make sure that you are selling as many products as possible. Don’t forget that there are plenty of other artists who have similar cosplay products to yours, so the best way to win customers is through good presentation and a cheap price.
There are numerous ways that you can sell your cosplay products, but the most important thing is to make sure that you have the right kind of product. It doesn’t matter how perfect and detailed it is if it’s poorly made; this is very important because it all comes down to how much money you earn, and that can only go up if your product looks good. So, be sure not to overlook even the smallest details in everything that you put out into the world for everyone to see.
In Conclusion
In conclusion, 3D printing can be used as a way to create cosplay props when you have the right materials and tools. In order to do this, you need a specific room in which you are going to print in order to protect your current workspace, time and patience for designing the perfect design, and the right software (like Tinkercad) for using digital designs. It is also important that one has a scale so that they can know how much space for their design there is before printing it out.