With advances in 3D printing technology, it has become easier than ever to make miniature objects at home, and many people are using this process as a way to create personalized designs. With a basic knowledge of 3D modeling software and some cheap modelling tools from online stores, you should be able to create models of practically anything that enters your imagination.
Contents
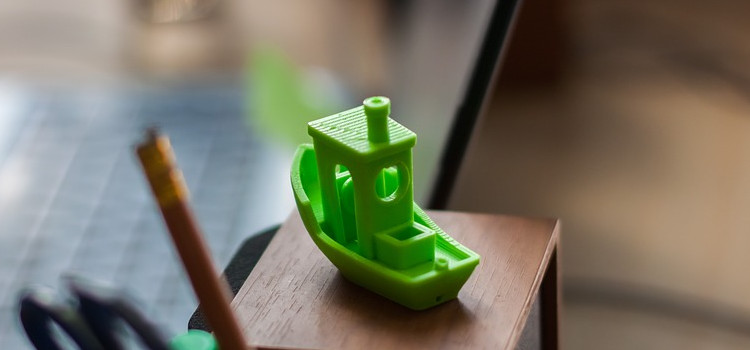
There are many ways to design 3D printed miniatures, and when you do create them, they can be sold and shipped right from your computer. A sense of imagination is important here because your designs will determine how the model turns out. In addition, 3D printing takes time to print or create a 3D model, so patience is also a key ingredient in creating these unique objects.
Read More – What Is The Best 3d Printer For D&D Miniatures
Designing 3D Miniatures Step By Step
Step 1: Get Familiar With A 3D Modeling Program
The first thing you’ll need to create your miniatures is a 3D modeling program. There are many different options on the market that vary greatly in terms of price and capability. The best option for most people is Google Sketchup, which is available for free on the Google website. Sketchup is fairly simple to use and its low cost makes it ideal for hobbyists or individuals who are just starting out in 3D design.
Step 2: Study Up On 3D Printing Materials
The next step is to learn what materials work best for 3D printing. This is a fairly complicated subject, and it’s important that you understand the different types of plastics and plastics used in 3D printing.
In reality, there are many materials out there that can be used to create miniatures. However, some are more suitable than others for 3D printing.
3D printing is a process of using a 3D printer to print layer after layer on plastic or another material. The 3D printer creates an object by melting plastic material and extruding it through a heated nozzle. The more layers you have in your object, the greater the detail it will have before the extrusion process begins again. As such, it’s important to know the best materials for 3D printing miniature objects. These include:
There are other materials that can be used in 3D printing. The most popular of these are PLA and ABS, which have traditionally been used in 3D printing. However, there are many new materials that have recently emerged, such as UV-cured and e-glue.
Step 3: Purchase Miniature Models Online
This is the easiest step in the process of creating miniatures for 3d printing. With a 3D model already created, you won’t have to spend time learning new models or creating them. You can purchase high quality miniatures from online stores for relatively little money. It’s also possible to create your own designs and sell them online after you have an idea of what sells the most.
Step 4: Create Your Own Designs
With the design complete, it’s time to move on to actually creating the 3D model in your 3D modeling software. After you’re finished designing the object, it’s time to create a 3D file for the object. Although Sketchup is free, you should still be prepared to pay some money for high-quality designs. It’s also important to note that some packages only allow people to sell their designs at a price of under 10 dollars, which doesn’t allow individuals to make a profit from their creation.
Step 5: Create Your Own 3D Printing Model
After you have created your model in Sketchup and saved it as an .stl file, it’s time to start the process of 3D printing the object. For this, you’ll want to purchase a 3D printer from your local store. The 3D printer will be able to print out your model based on its settings and settings. There are several different types of printers or 3D printers that are available on the market, so it’s important that you pick one that’s best suited for your needs.
Step 6: Profit?
With the process of creating miniatures for 3d printing completed, it’s time to take advantage of your hard work and sell your models online or at a local store. After you’ve received some profit from selling your miniatures after taking off the costs of how much filament you used, move on to the next step and continue creating miniatures for 3d printing.
By mastering this process of designing 3D printed objects, you will soon be able to create anything that enters your imagination.
How Much Does It Cost To 3D Print A Miniature
How much do they cost to print? Varying by size and detail of the model, a 3d printed miniature can range from $2 to $30. A larger, detailed model can cost more due to the time it takes to print. The average cost of 3D printing a miniature is $7.50 per 5 cubic inches. At that rate, a 15-centimeter tall miniature will cost approximately $30 to print.
Is 3D Printing Miniatures Worth It?
3D printing is an emerging technology that, if you are considering it, is worth it. The 3D printers have come a long way over the past decade and people are using them for work and play. If you are looking to using 3D printing for miniatures, it is worth it because of the affordability and practicality of the technology. When buying a 3D printer (assuming you don’t already have one), you have a variety of options, and if you are looking to print miniatures, there are many different printers that can do it.
Conclusion
In conclusion, when you’re designing 3D printed objects, the most important thing to do is how the object will be used. For instance, if it’s a toy, what materials would work best for it? On the other hand, if the miniatures are going to be used for decoration in an art gallery or museum, then what would need to be taken into consideration? Decide on this before you start designing and printing.
Having said that, there are many different ways to create 3D printed miniatures. Some people use a 3D modeling software like Sketchup, or a 3D printing program like Autodesk 123D. The best designs start with a design in some sort of software before they move on to create the actual model in the 3D printer.